Print Jobs
This is an experimental feature. Some functionality may change as the feature evolves.
Add from Print Job allows you to add a virtual printer to your Windows or Mac computer. The virtual printer will automatically convert and upload any pages "printed" to it from any application on your computer. This allows you to create content in creative and business software not directly supported by Exceed Cast.
Authentication
The virtual printer is available to any computer connected to the internet. When the printer is installed, authentication is required. An authentication token is generated per-zone automatically by Exceed Cast. This token is visible to any user who has Zone Editor permission on the zone. If the authentication token becomes compromised, it can be rotated by clicking the refresh symbol above the token on the Add Content -> Print Job page.
Default Printer Settings
The virtual printer supports one paper size out of the box: 16 inches by 9 inches. This is to ensure content printed is fitted to the screen ratio of the player hardware. Other paper sizes will not be rejected, but are converted as is. This may result in black bars on content when displayed on player hardware.
The virtual printer supports both Color and Monochrome jobs.
Content automatically added by the virtual printer will always be set to hidden by default. You will have to edit the zone after printing in order to make the content visible.
Limitations
Overall limitations
- Each instance of the Exceed Cast Virtual Printer will only add content into one specific zone.
- If printers on your computer are available to other users (system-wide), other users will be able to add hidden content to zones without authentication.
- If the authentication token is reset by any zone editor, all printers installed for that zone (even by other users) will need to be re-setup.
Windows specific
- Only one instance of the Exceed Cast Virtual Printer can be installed on a computer at a time.
- The Windows installer will add a Microsoft signed certificate to the System Trusted Publishers certificate store, which is needed to install drivers.
Installing on Windows
First, download and install the latest version (1.0.3) of the Exceed Cast Virtual Printer Driver.
Next, open an Exceed Cast zone page, and select Add Content -> Print Job. When the page loads, click Microsoft Windows in order to get the authentication token we will need later.
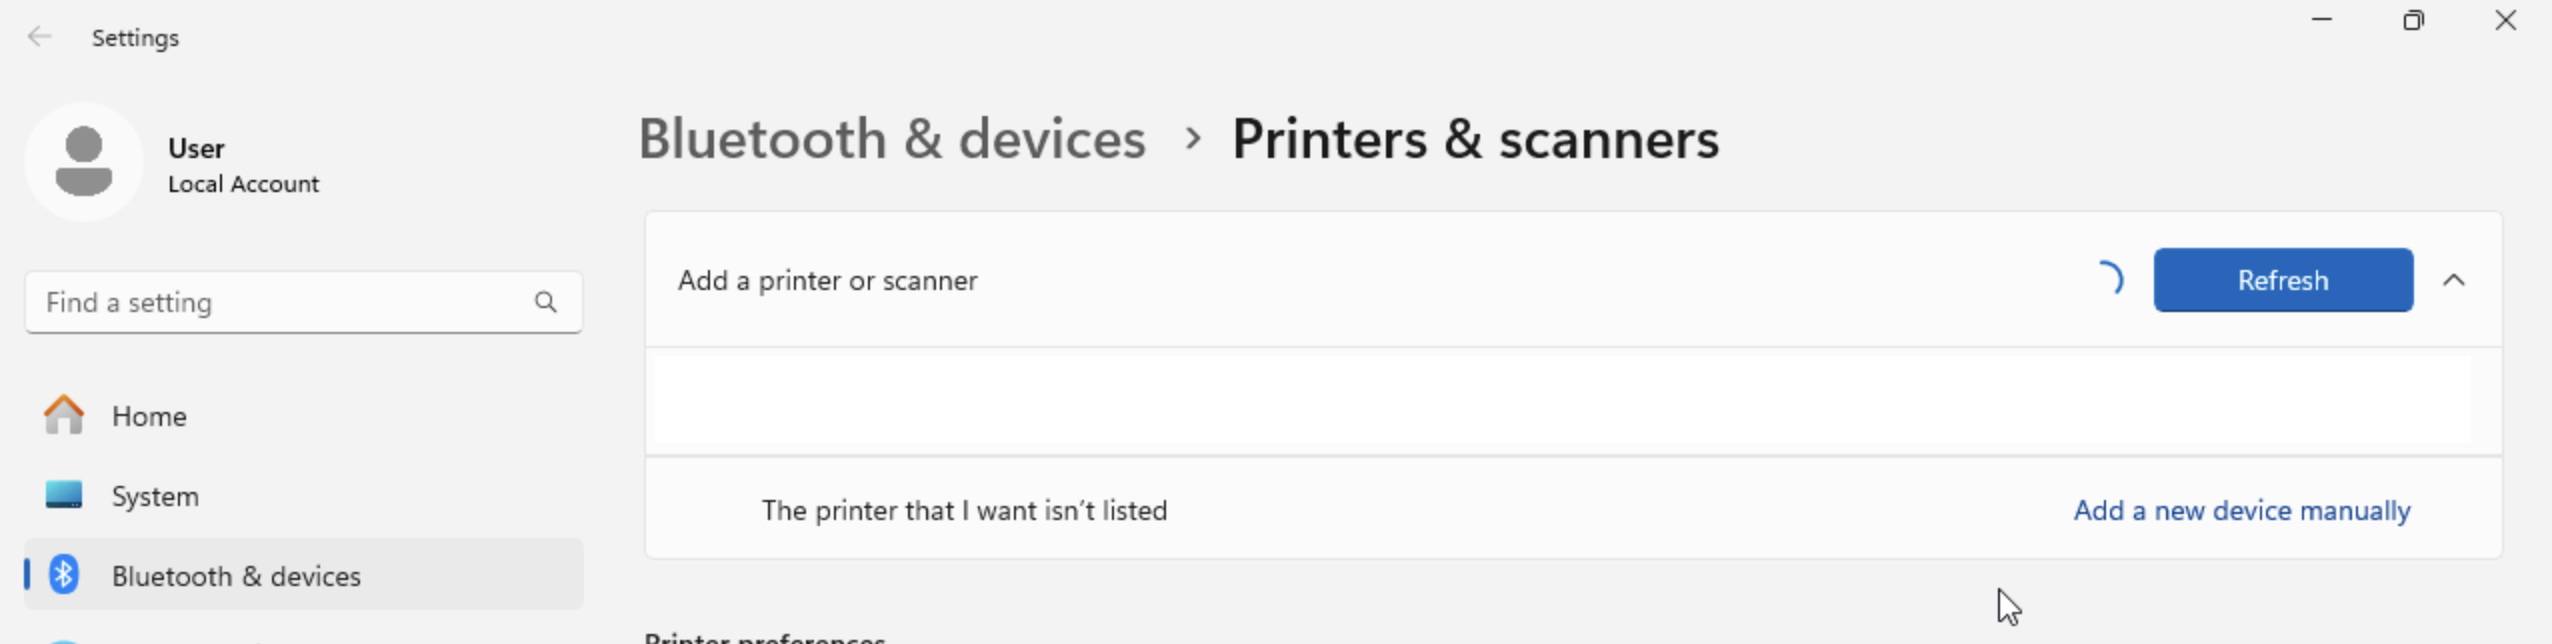
After the driver is installed, open Settings and navigate to the Printers section. Click the Add Printer button and after a few moments, click the hyperlink labeled Add a new device manually.
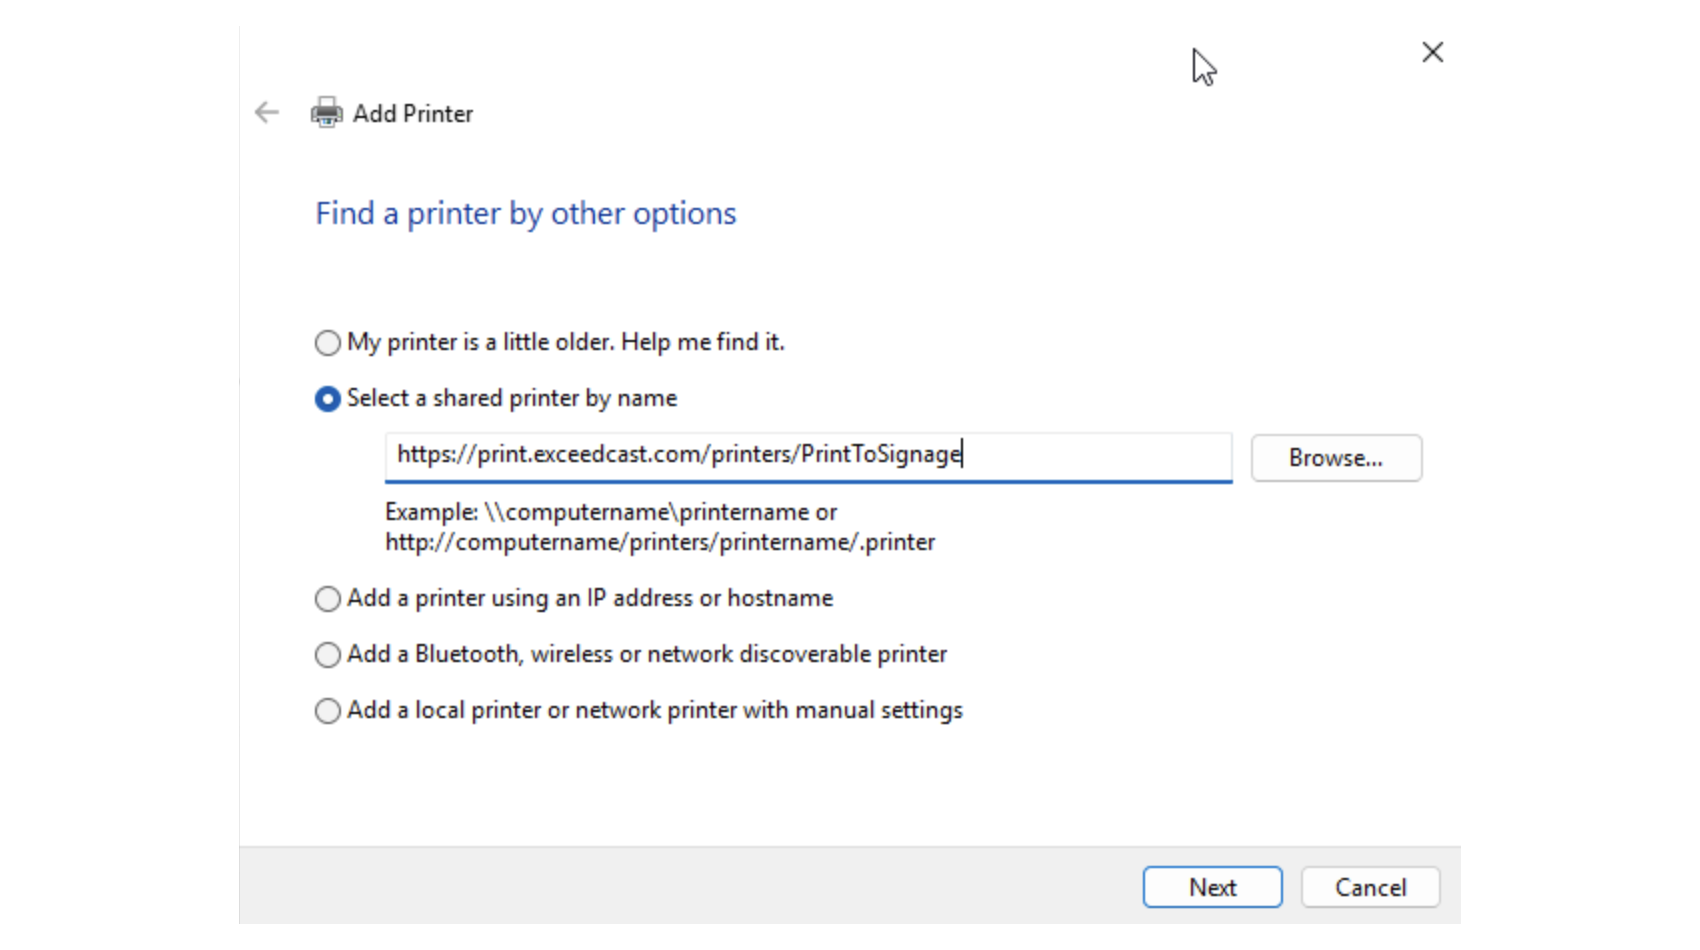
A new window will open. Select the option Select a shared printer by name, then enter the URL provided on the Print Job setup page in Exceed Cast. Click Next to continue.
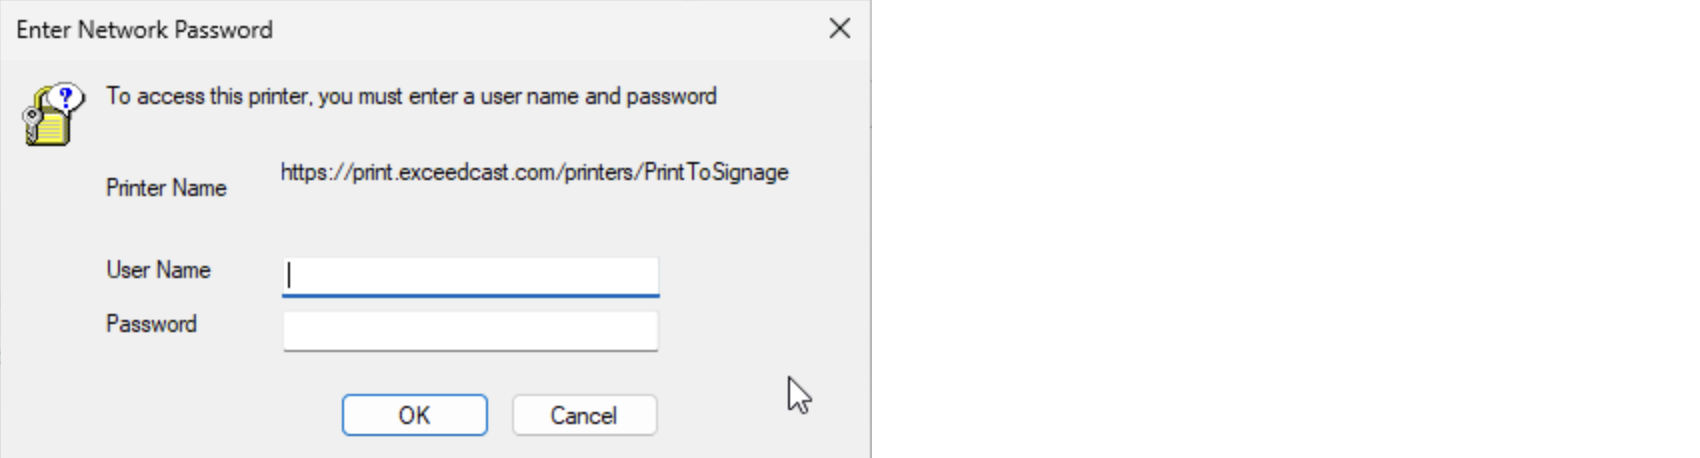
An authentication dialog will open. Enter the authentication token shown on the Print Job setup page in Exceed Cast as both the username and password.
Click OK. Your computer will then communicate with the server to determine the driver to use. It should automatically select the Exceed Cast PS Printer driver you installed earlier.
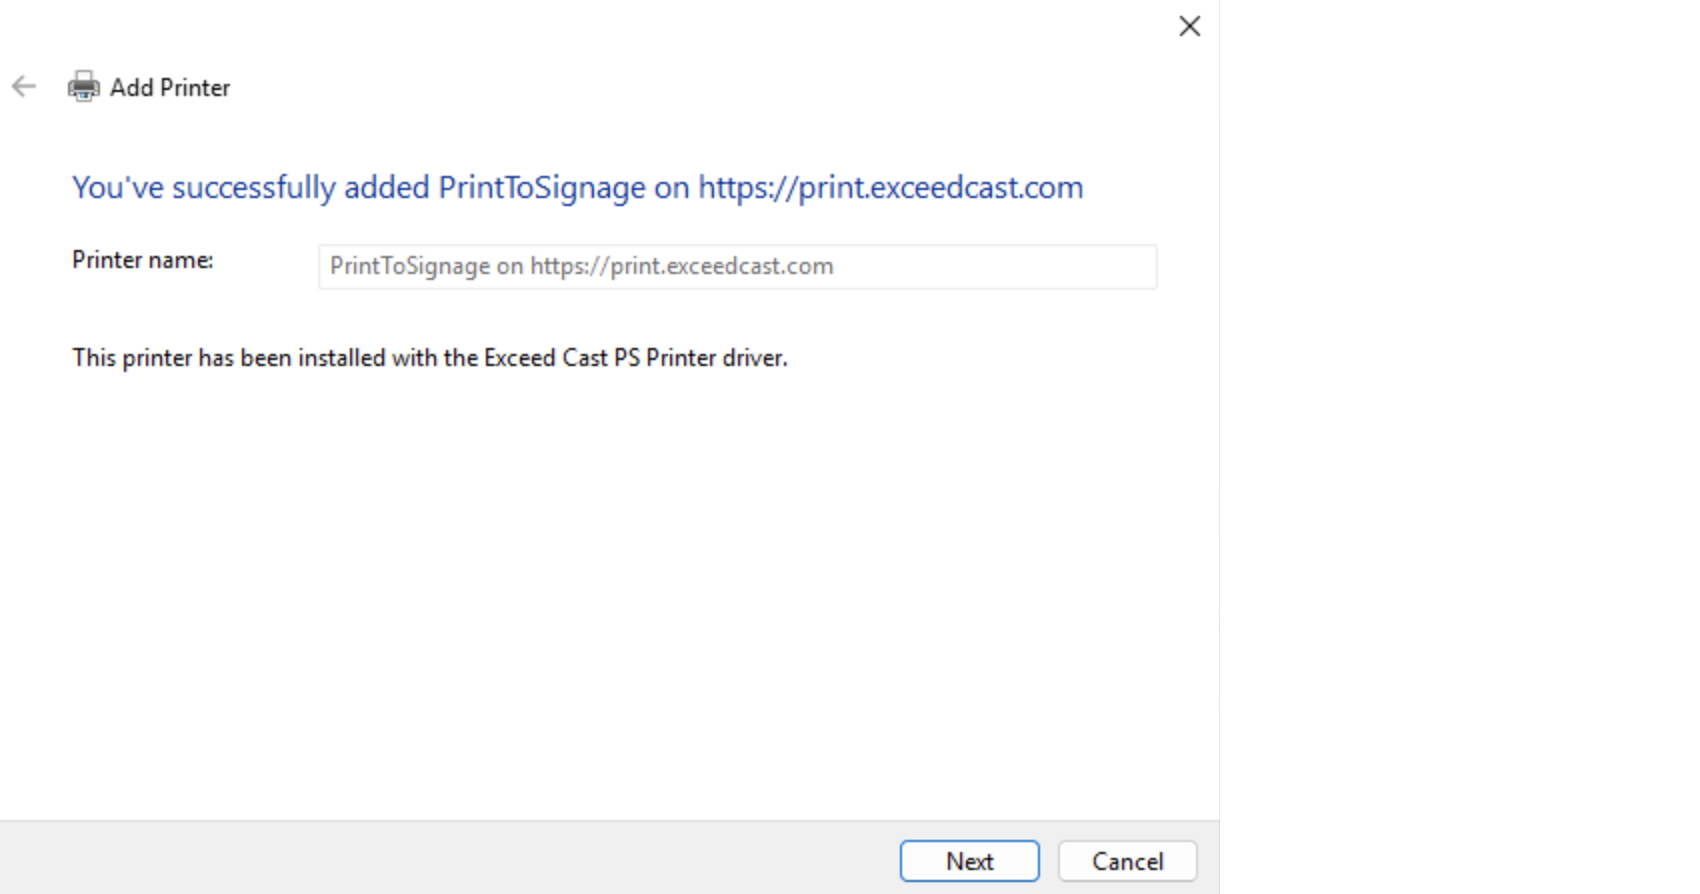
Click Next and then Finish to exit the wizard.
You have now successfully installed the virtual printer on your computer. You can now open any application that allows printing and select the PrintToSignage on https://print.exceedcast.com printer to automatically upload the content to Exceed Cast.
Due to Windows limitations, you may only have one Exceed Cast Virtual Printer installed on your computer at a time. When you add the printer, the authentication string you provide will link the printer to a specific zone. If you wish to change the zone later, you will have to delete and re-add the printer again.
Installing on macOS
First, download and install the latest version of the Exceed Cast Virtual Printer support files.
Then, open an Exceed Cast zone page, and select Add Content -> Print Job. When the page loads, click macOS in order to get the printer URL we will need later.
Next, open System Settings and select the Printers & Scanners section. Click the Add Printer, Scanner, or Fax... button.

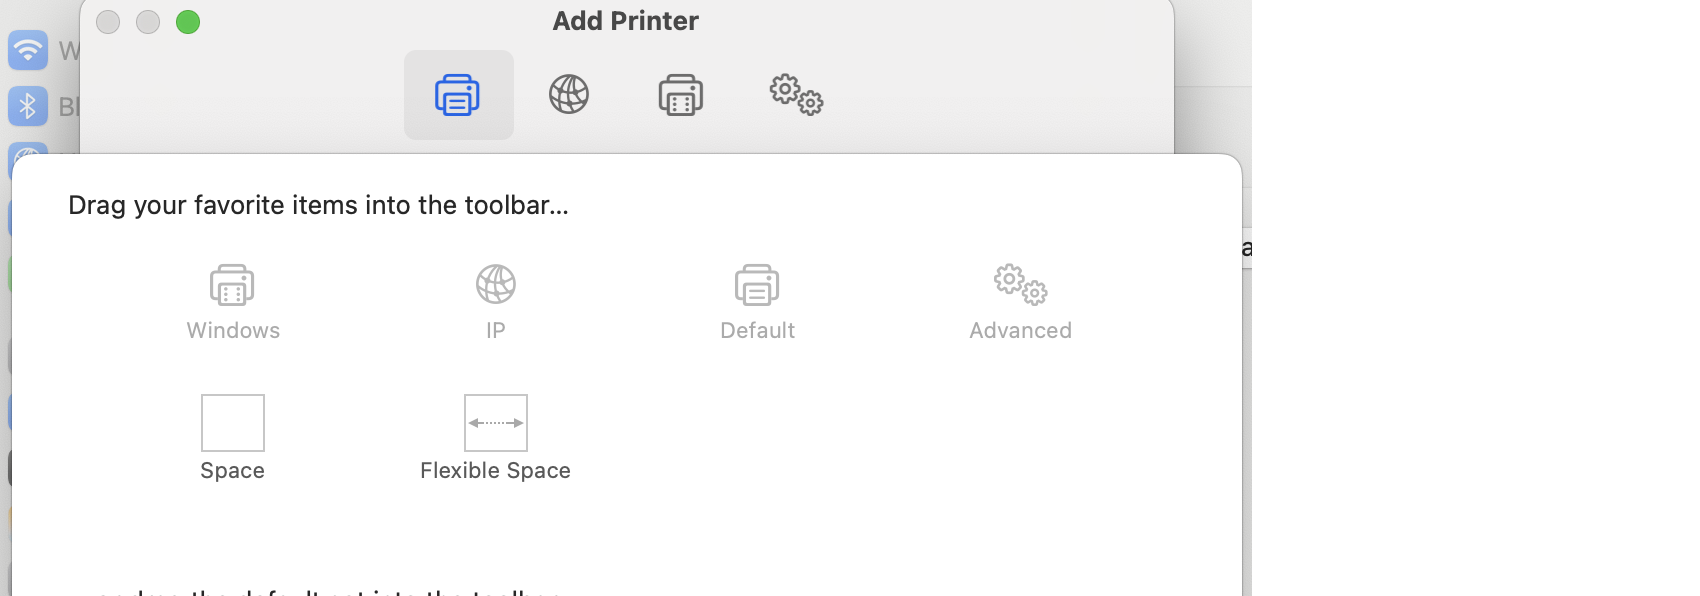
If you do not see the Advanced tab (gear icon), right-click on the blank screen in the toolbar and select Customize Toolbar. When the Customize dialog opens, drag the gear icon on to the toolbar.
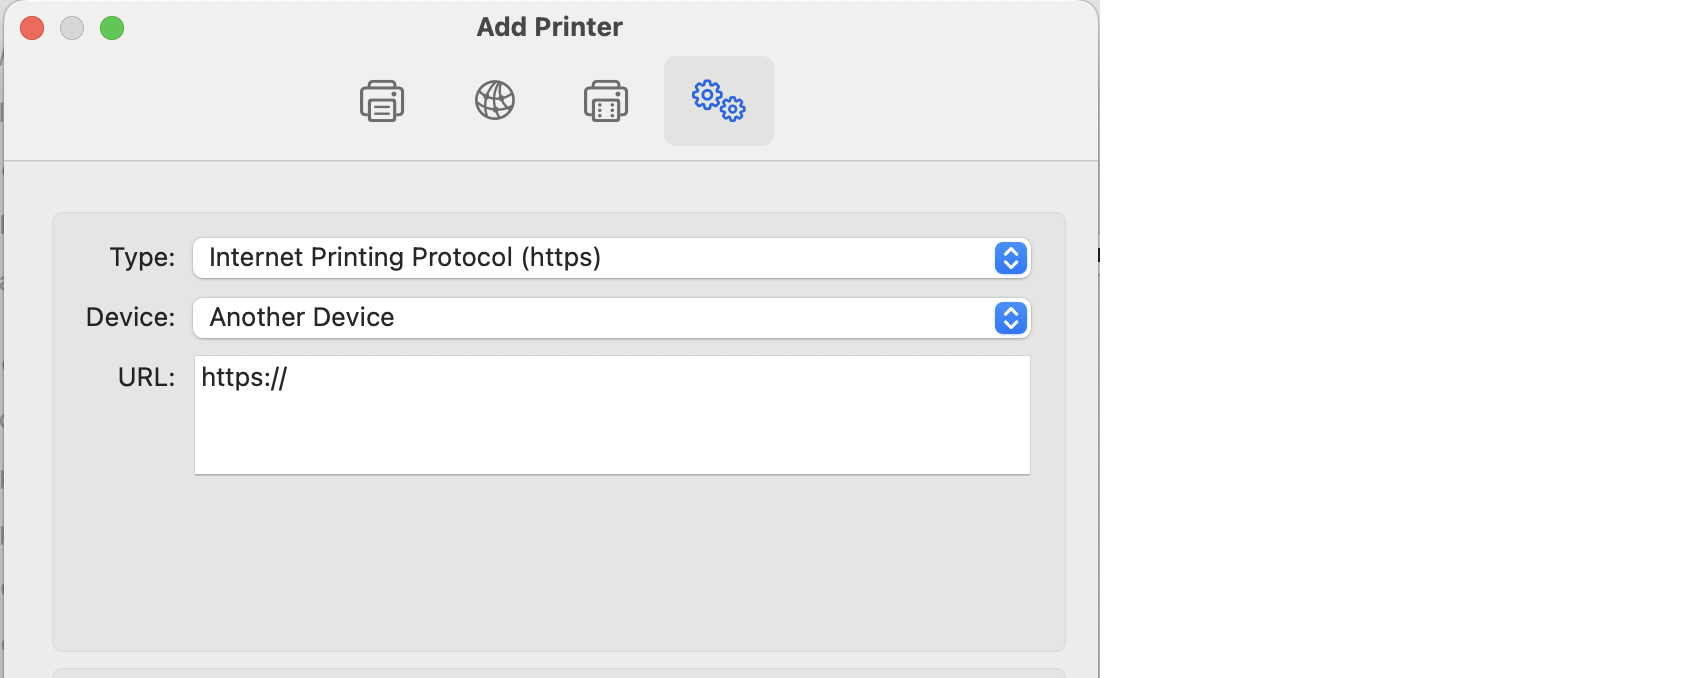
Close the Customize dialog, and click the gear icon in the toolbar to switch to the Advanced tab. Once the page loads, change the printer type to Internet Printing Protocol (https). In the URL box, enter the URL listed in Exceed Cast.
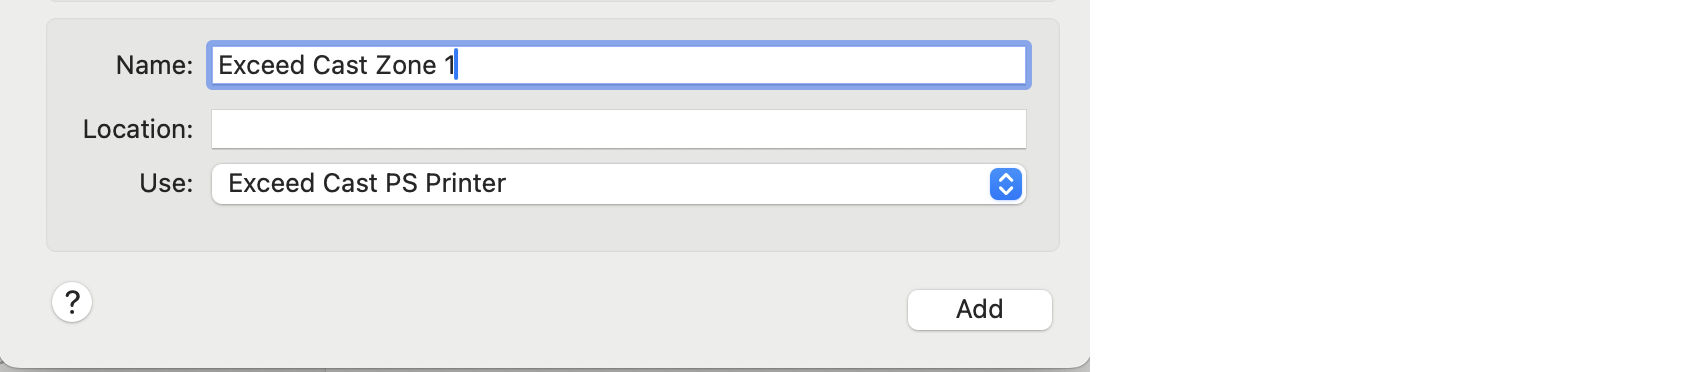
At the bottom of the dialog, enter a name for the new virtual printer (such as the zone name). Then in the Use box, select Select Software... then Exceed Cast PS Printer in the dialog.
Click the Add button. The printer is now added to your system and available for use in your other applications.
If you wish to add printers for additional zones, repeat this process, obtaining a new URL for each zone.