Deploy with Mosyle MDM
The following steps depict the process using Mosyle Business Manager. Other editions of Mosyle (such as School) should follow a very similar process.
Step 1. Obtain app licenses via ABM/ASM
Make sure you have already purchased app licenses using Apple Business Manager or Apple School Manager before continuing.
Also, your Apple Business Manager or Apple School Manager account will need to already be linked to your Mosyle account.
Step 2. Add new Install App profile
Log into Mosyle Manager, and then navigate to Management at the top. Make sure tvOS is selected on the left sidebar, and select Install App from the list of profile types.
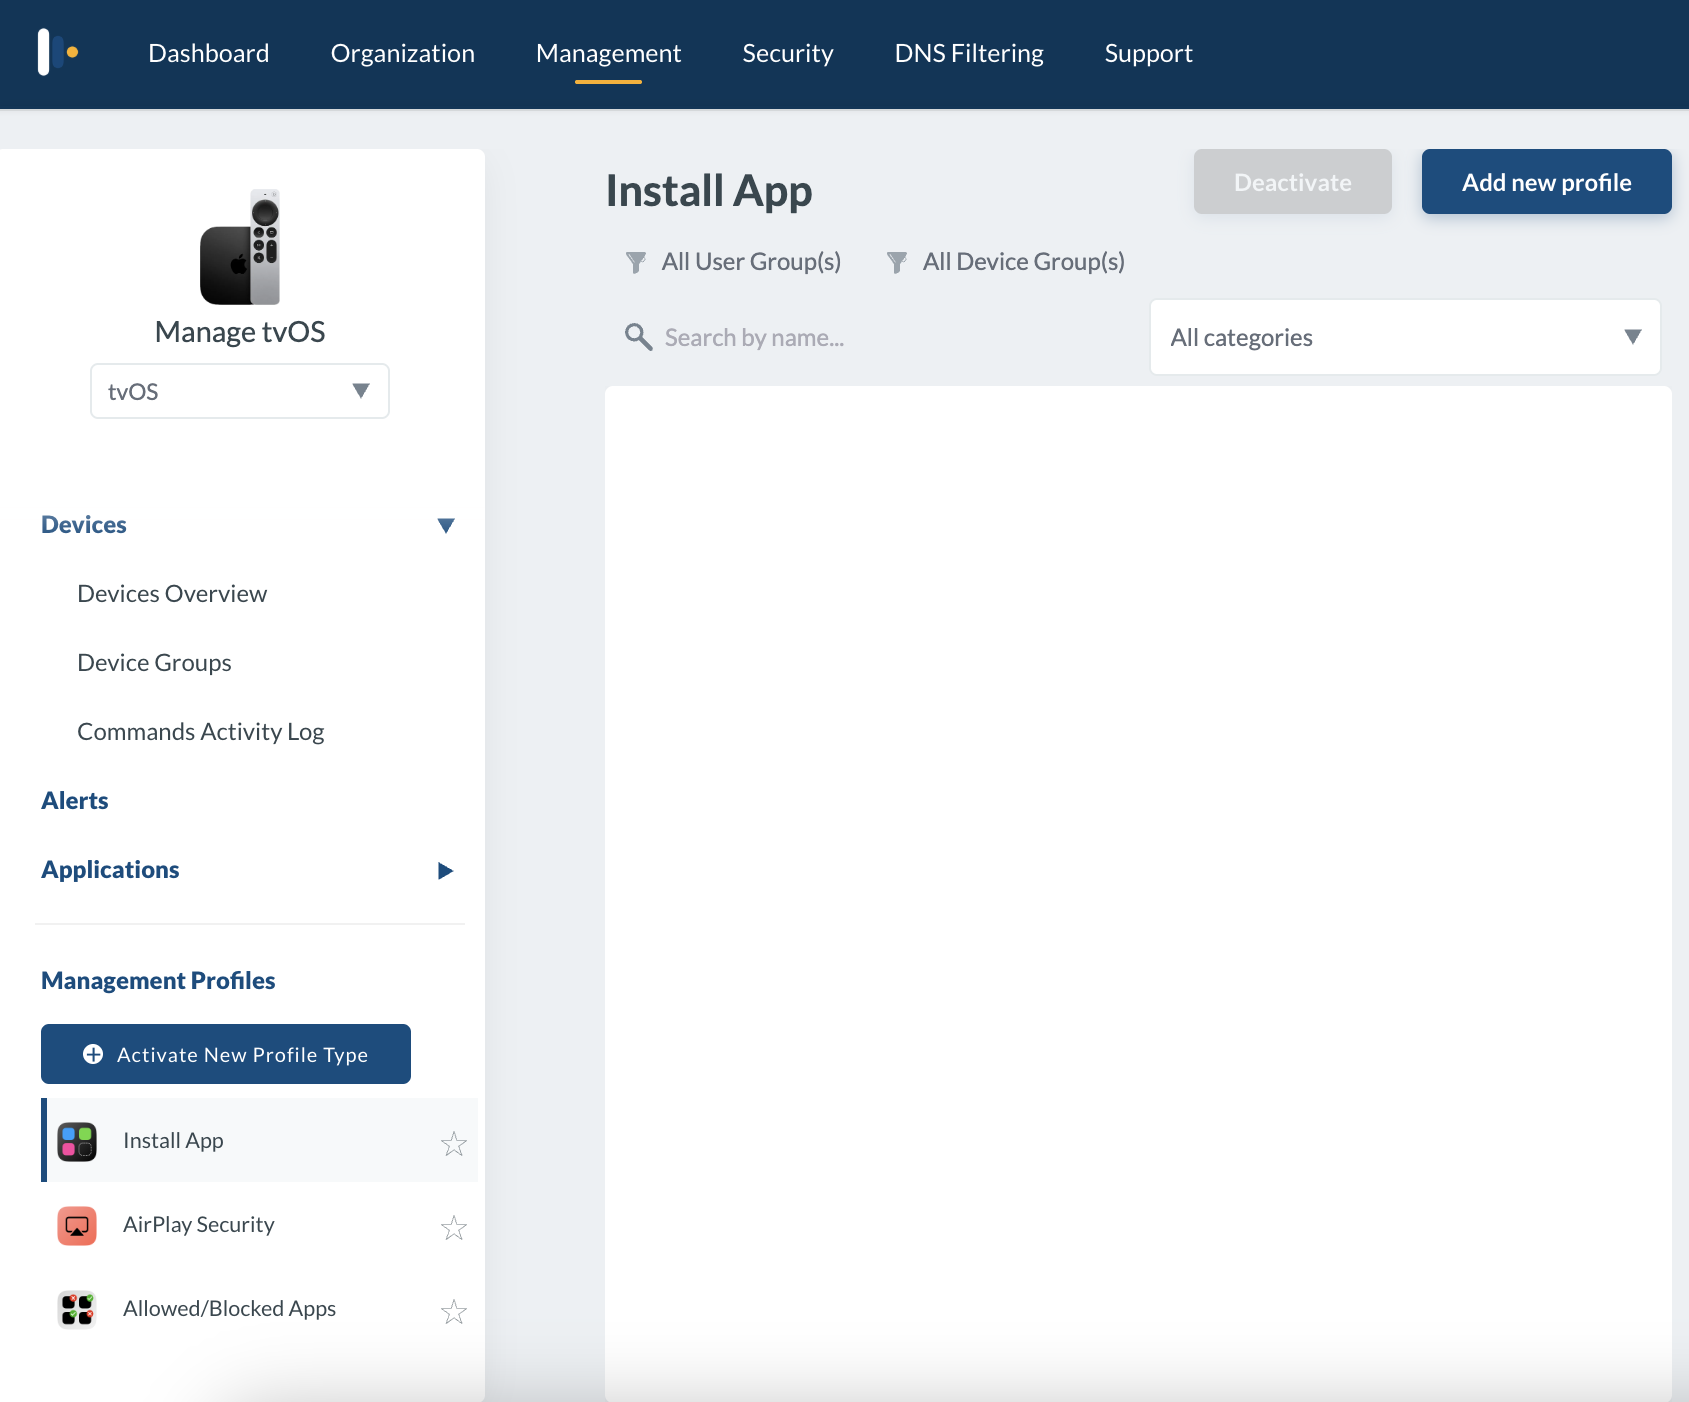
Select Add new profile, and name it. For the app source, select Apps and Books.
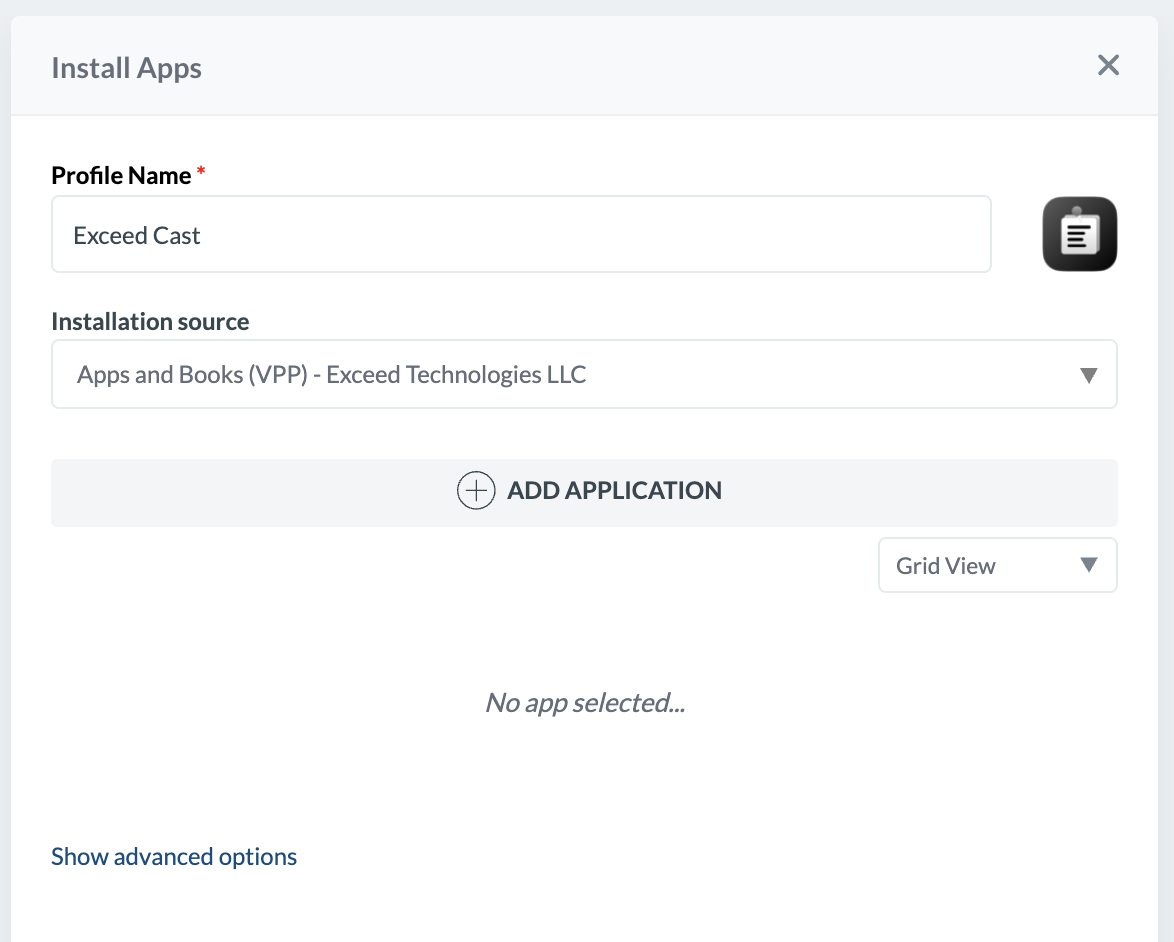
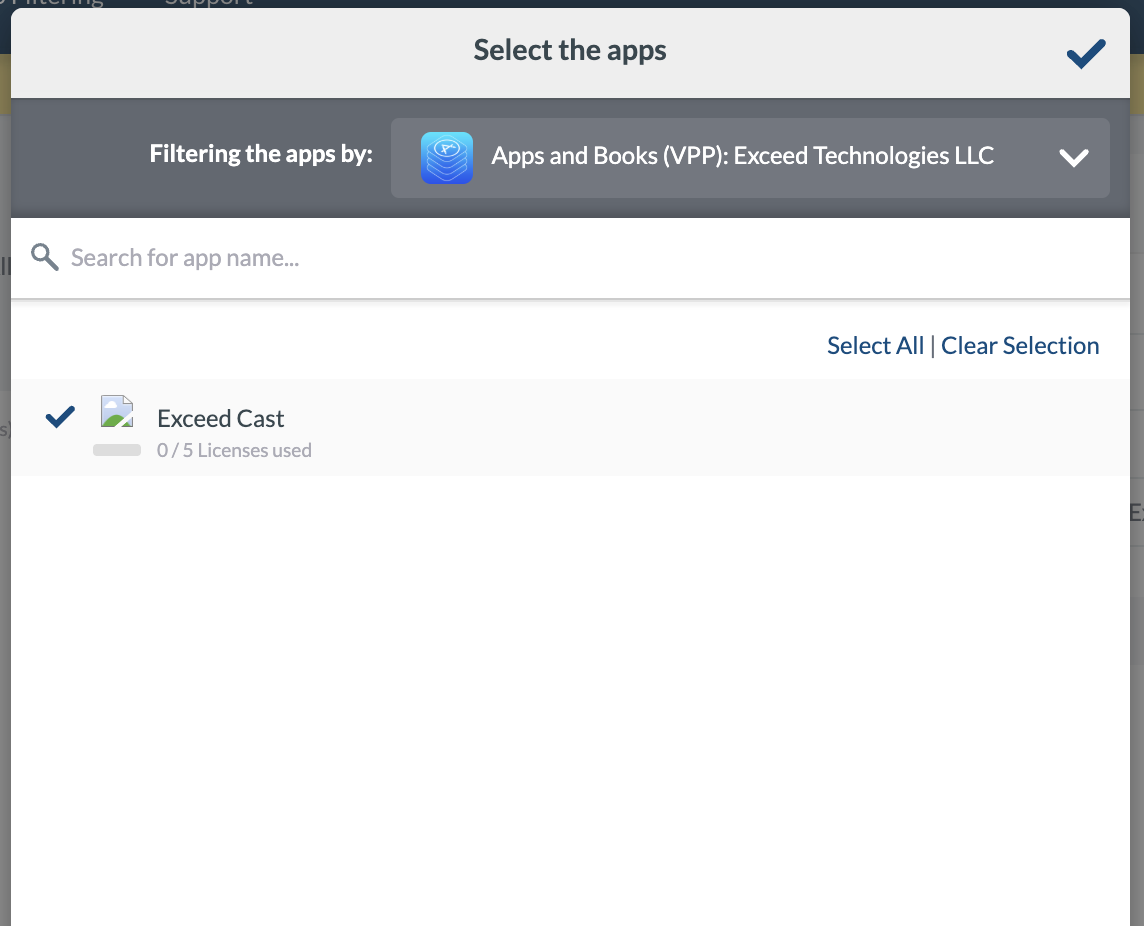
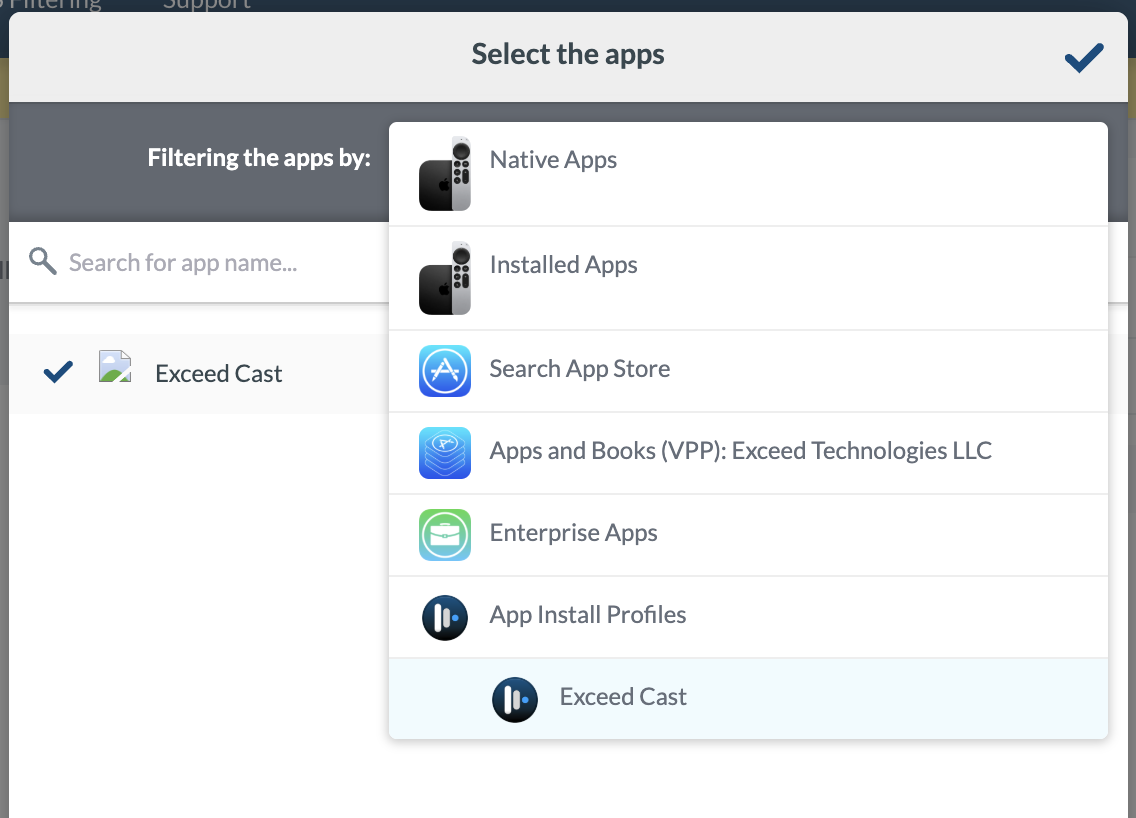
Next, click Add Application and select Exceed Cast from the list. If you have purchased a lot of tvOS apps, you may have to search for it to appear.
It will now appear in the list below the Add Application button.
Step 3. Apply app configuration
Click the black C icon next to the app name to add configuration settings.
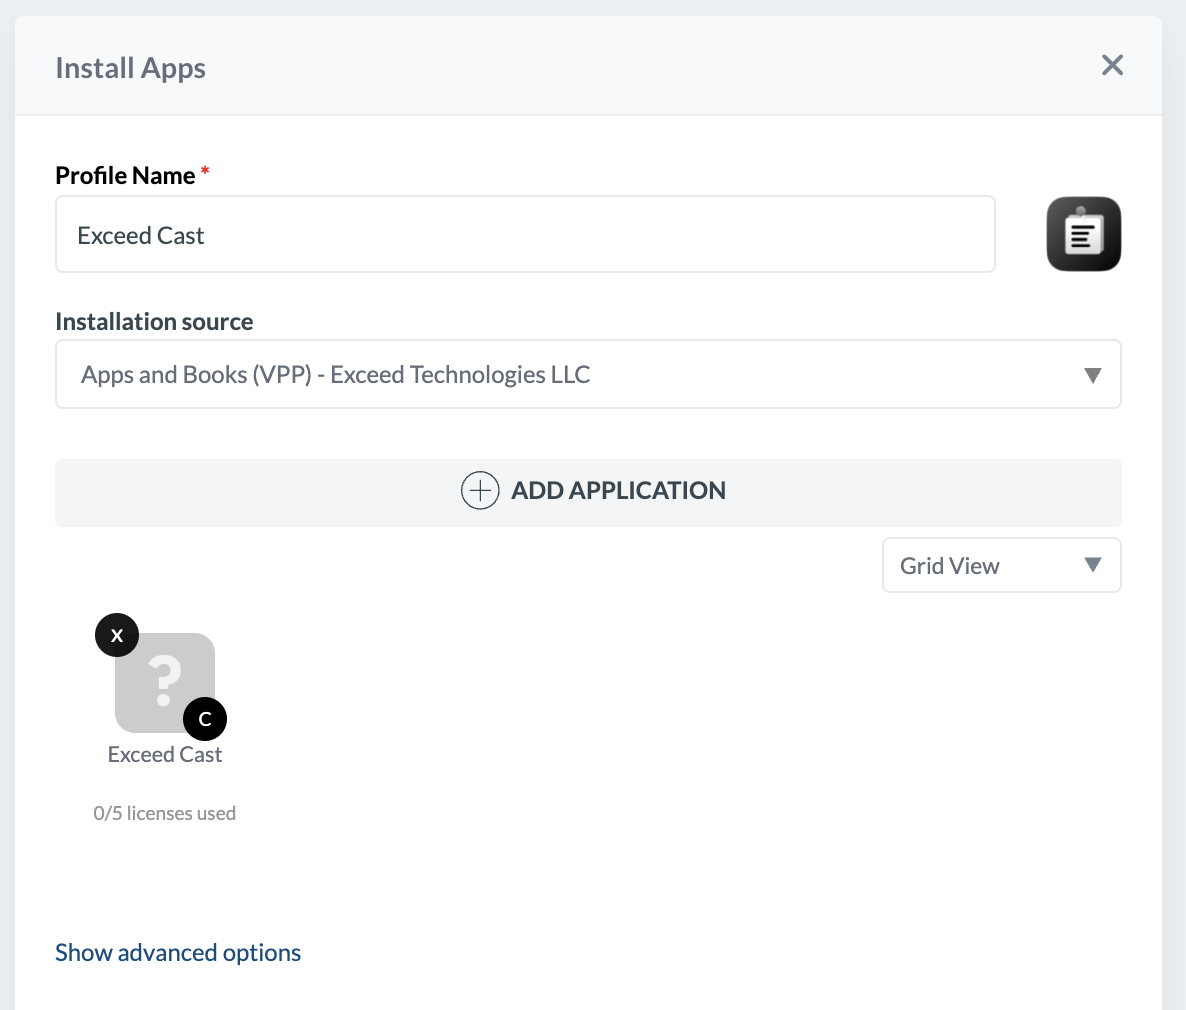
A configuration popup will appear. Make sure Prepare and Apply an AppConfig PLIST and Enable Variables for this AppConfig PLIST are both checked.
Enter the following text in the editor block:
<dict>
    <key>name</key>
    <string>%SerialNumber%</string>
    <key>enterprise_key</key>
    <string>YOUR_ENTERPRISE_KEY_HERE</string>
</dict>
Replace the text YOUR_ENTERPRISE_KEY_HERE with the enterprise enrollment key found under the edit button on a Division in Exceed Cast.
You may also replace the value of name entry if desired in the block above. The default value will automatically insert the device's serial number as the visible identifier for the device in the Exceed Cast portal. This option usually scales well, and we recommend you leave it set to that.
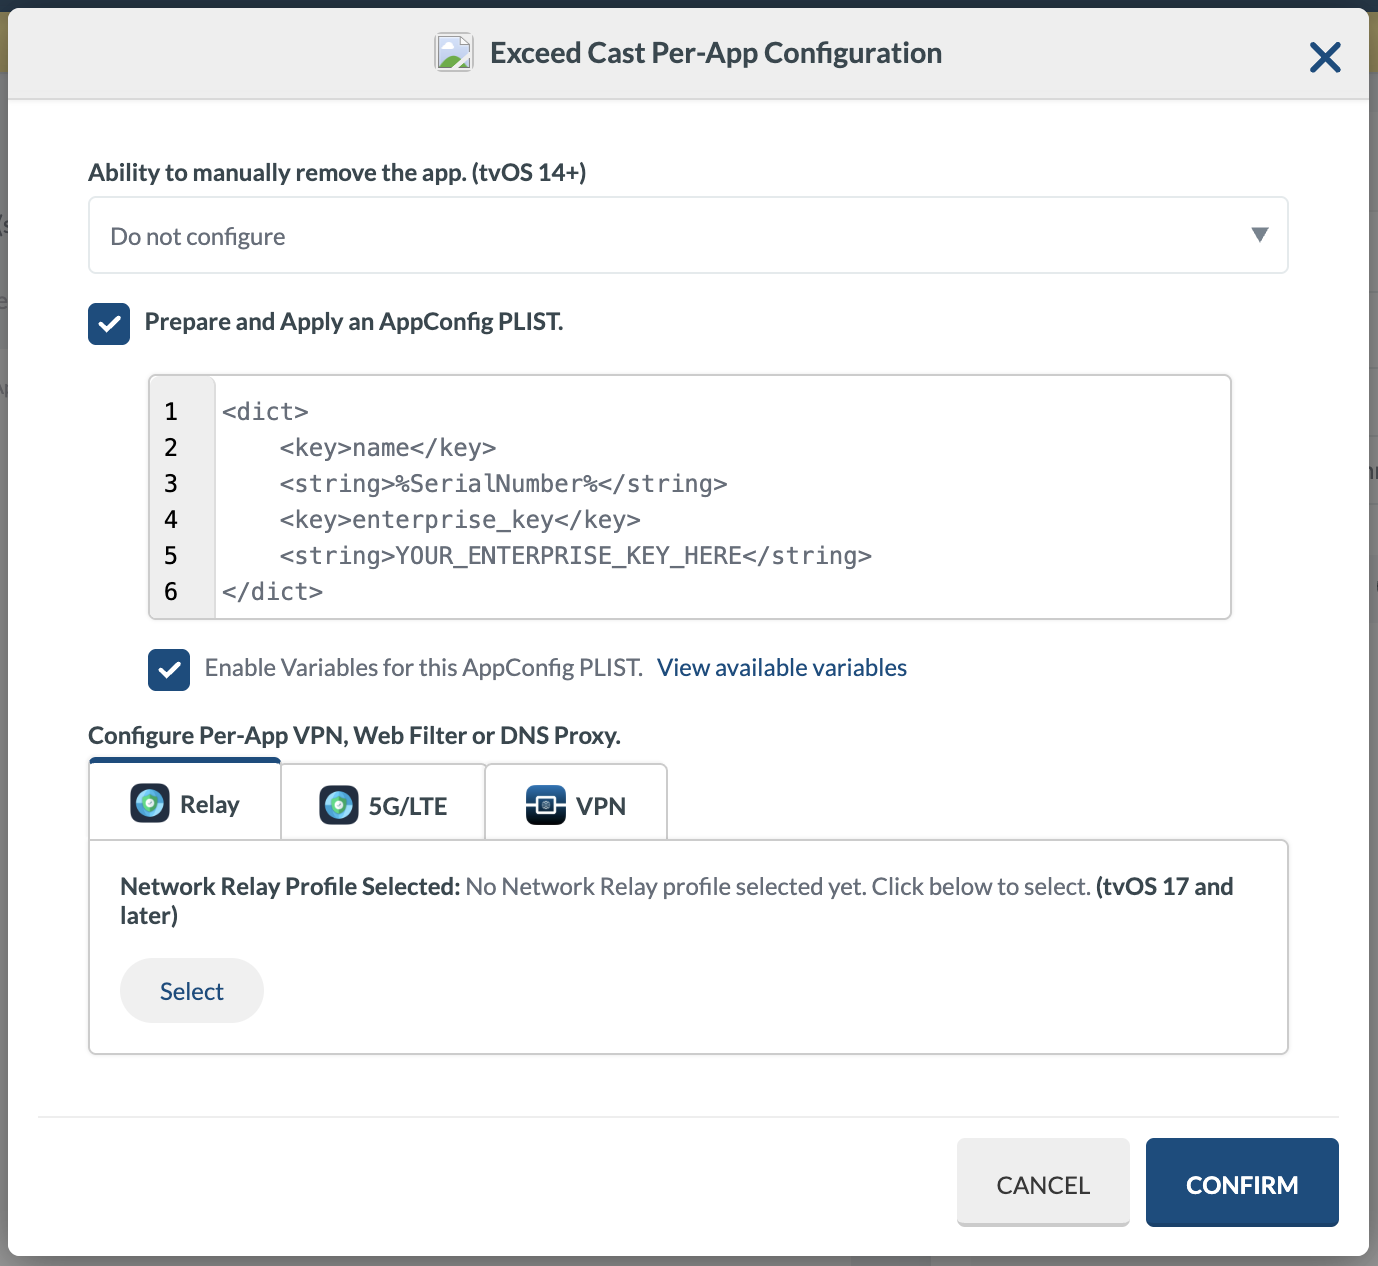
Click Confirm to save the configuration.
Step 4. Scope and deploy
As with any other profile in Mosyle, you may now select the assignment for this app profile. You may want to create a Digital Signage devices group, or you can individually scope the profile as well.
Click Save and the Exceed Cast app should start deploying to your devices.
Step 5. Setup single app mode
If you do not already see App Lock as a profile type on the left sidebar, click Activate New Profile Type, then select App Lock to enable the option.
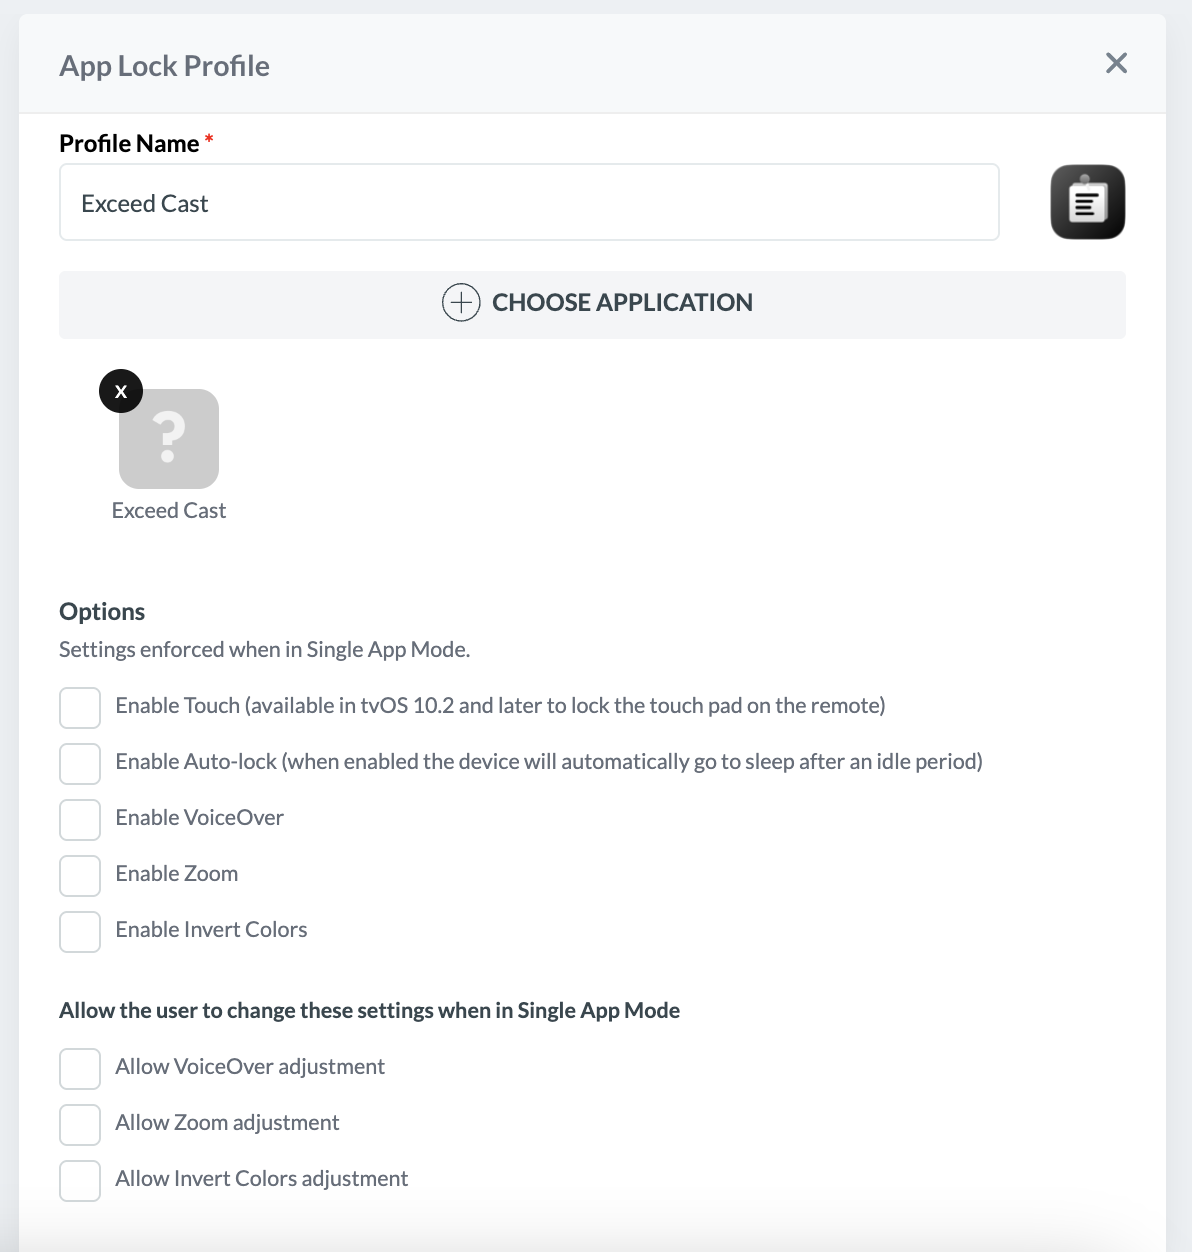
Once in the App Lock section, click Add new profile to create a new profile. Give the profile a name, and click Add application. In the dropdown at the top of the popup, select App Install Profiles, then select the name of the App Install Profile you created in the previous step.
Click Confirm on the dialog, and you will see Exceed Cast has been added to list. Next, ensure all checkboxes are cleared. This will prevent the device from responding to any input from the remote.
Select the assignment scope for this profile and save. Any devices in the assignment that haven't already launched the app will now launch the app and be able to exit.
Step 6. Done!
Devices in the assignment scope of both profiles will now automatically download, launch, and register the player app with your Exceed Cast account. You may now go in to the Devices section of Exceed Cast, and assign devices to zones. Once they are assigned to zones, they will begin playing any scheduled content.
Exceed Cast and Exceed Technologies are not affiliated with the Mosyle Corporation. Mosyle and Mosyle Manager are registered trademarks of Mosyle Corporation.