SSO with Keycloak
Keycloak is a tested integration and supports all SSO features that Exceed Cast offers.
☑ Single Sign On is supported using the SAML 2.0 protocol.
☑ Single Log Out is supported using the SAML 2.0 protocol.
Setup Keycloak
Start in Exceed Cast
First, navigate to Organization then SSO Providers in Exceed Cast. Click Add provider.
If your Keycloak instance is publicly accessible on the internet, select SAML via metadata URL (recommended) from the available type options and click Continue. If your Keycloak instance is not available publicly, select SAML via metadata file from the available type options and click Continue.
Under the section labeled SP Metadata URL click the file download icon. The Exceed Cast metadata will download to your computer. You will need to provide this to Keycloak in the next step.
Leave this page open while you configure the next steps in Keycloak.
Create client in Keycloak
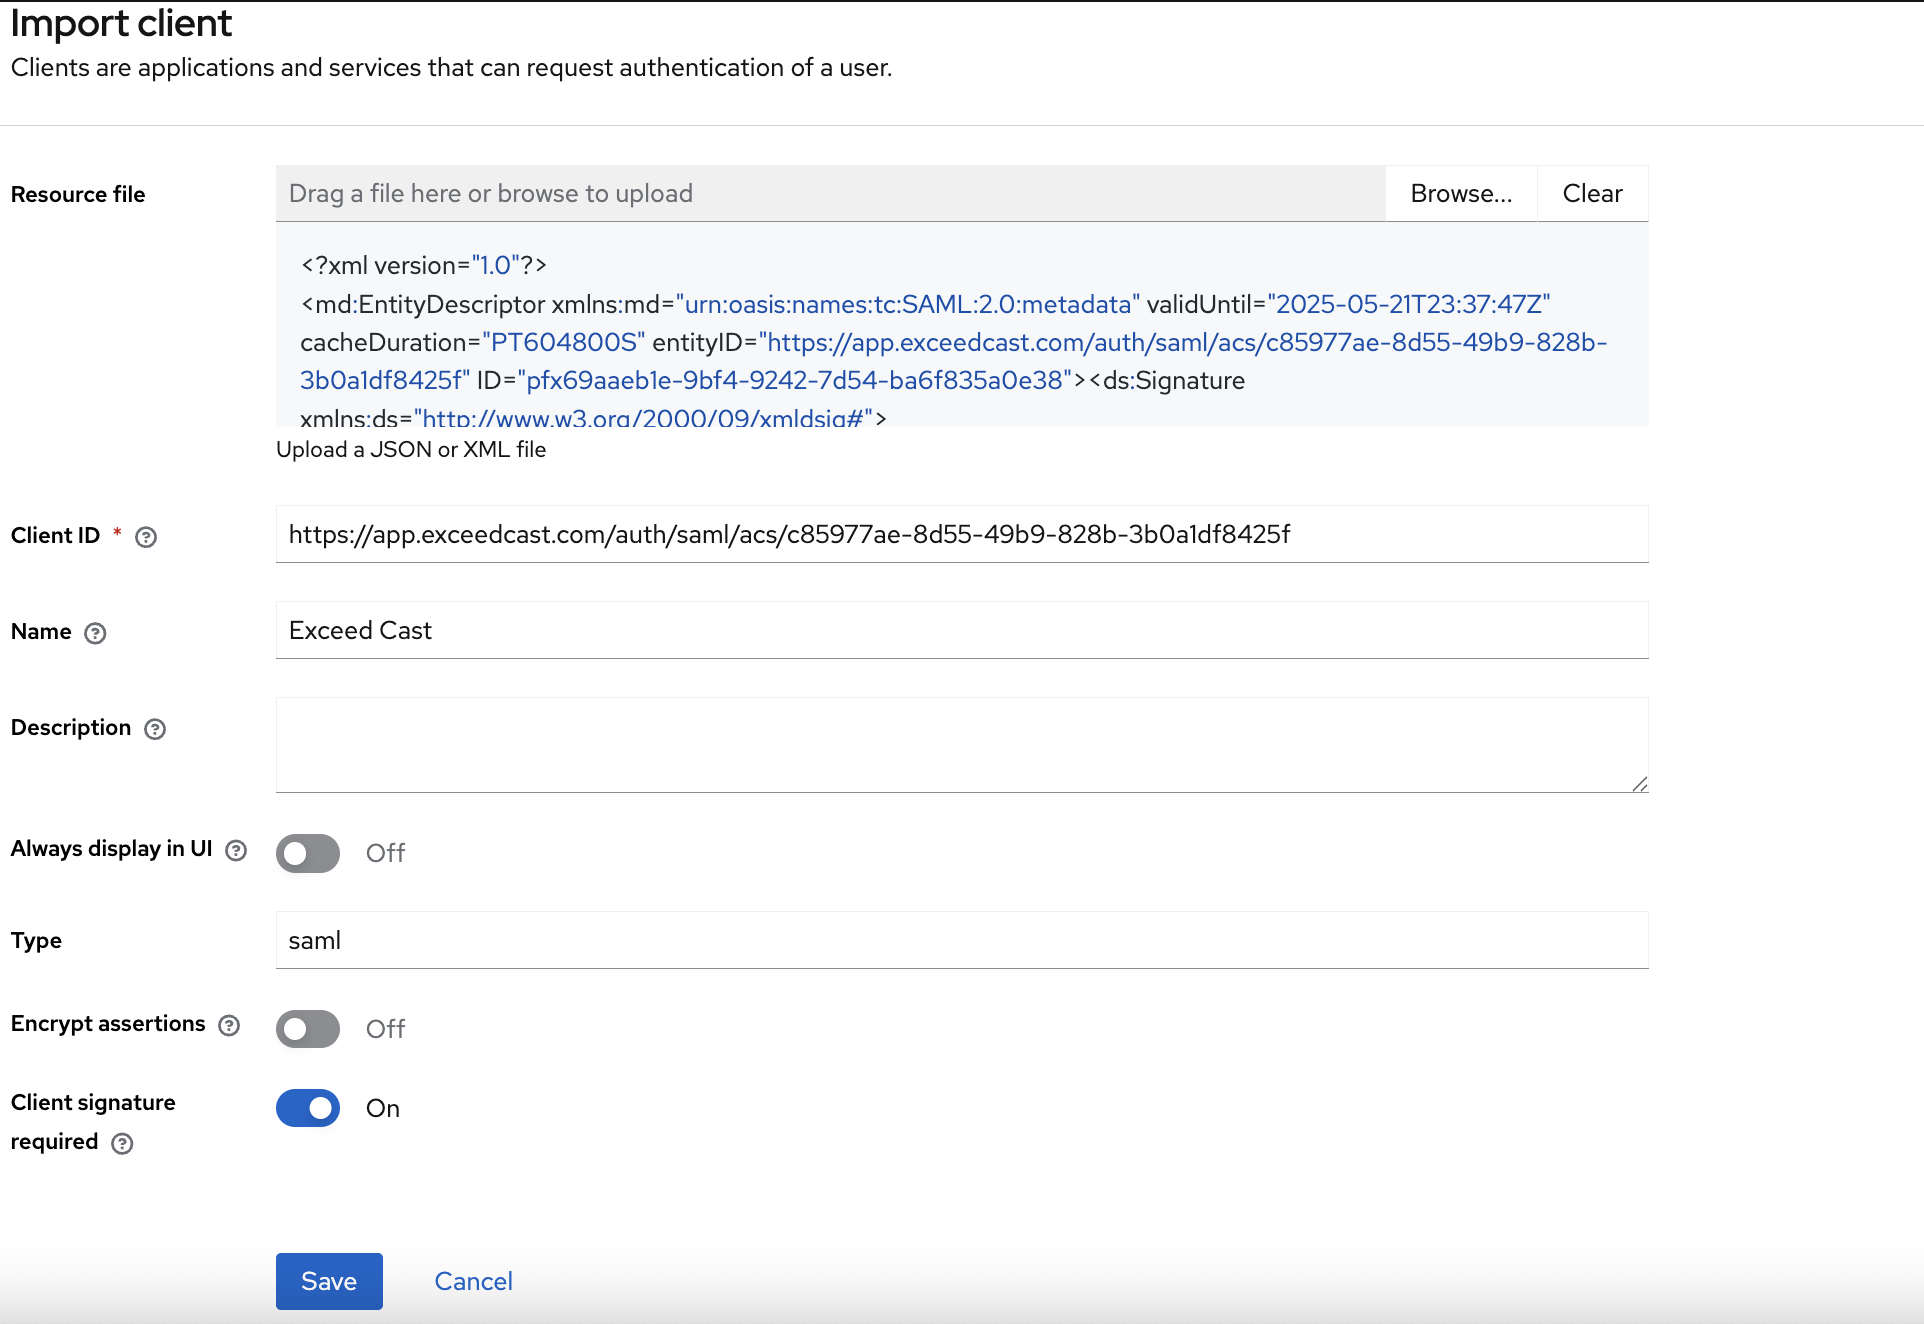
Open your Keycloak admin portal, and navigate to the Clients section. Click the button labeled Import client. On the next screen, upload the file downloaded from Exceed Cast in the box labeled Resource file. In the Name box, enter a name for this application such as Exceed Cast. Click Save.
Setup attributes (optional)
If you would like to configure attributes for just-in-time provisioning, you can navigate to the Client scopes tab under the client details in Keycloak. The displayName attribute will already be loaded from the metadata. You can edit the attribute to send the Keycloak attribute that contains the correct data for your organization.
Attribute configuration is not required for single sign on or single log out to function.
Complete integration
Adding via Metadata URL
If you are adding Keycloak via metadata URL, make sure your Keycloak instance is accessible over the internet. Back in Exceed Cast, enter https://<your keycloak URL>/realms/<realm name>/protocol/saml/descriptor for the IDP Metadata URL and click Save.
Adding via Metadata File
If you are adding Keycloak via metadata file, navigate in a web browser to https://<your keycloak URL>/realms/<realm name>/protocol/saml/descriptor. Once the page loads, save the contents of the page to a file. Upload the saved file to Exceed Cast for the IDP Metadata File and click Save.
Finish setup
Exceed Cast will then communicate with Keycloak to retrieve the remaining settings. Integration has completed when you are redirected back to the SSO providers list with a success message.
You can then edit the newly added Keycloak provider to assign your verified domains. Once your domains are assigned, all non-administrative users will be redirected to sign in via Keycloak.
You should now test your integration using an Incognito or Private browsing window. Once you provide your email address, click the Sign in using organization SSO button to continue to Keycloak.